Thursday, May 12, 2022

Deploy ASAv in EVE-NG with detailed steps - NetworkerStream

 1. To deploy ASAv qemu firewall we need to login into your EVE-NG 

after you logged in we should see the screen as follows


 Here we need to create a new lab to upload our ASAv Cisco Firewall

Next, we need to specify the LAB name, description and we'll click on the save button.

After we have created lab we need to verify whether we have installed ASAv Firewall or not! so as you can see it’s not installed and we need to install it in our EVE-NG

Install ASA qemu firewall in EVE-NG we need to upload ASA qemu file first.

To upload images into your EVE-NG we need an application like Filezilla or WinSCP. we should connect to eve-ng by IP and root credential and default password which is “eve”

So here we have two sides as it’s shown in the screenshot. The left side is your computer side and the right side is your EVE-NG side, simply from the computer side we’ll find the images directory and we’ll right-click on the desired folder and will choose upload, to upload your image into your eve-ng

Then we need to connect to EVE-NG with putty to apply fixpermission command.

Next, we need to apply this command “ /opt/unetlab/wrappers/unl_wrapper -a fixpermissions “ where we have uploaded the eve-ng qcow2 image which is in /opt/unetlab/addons/qemu/ directory. So first we’ll go to the image directory by the cd command👇

Once we applied the command for the ASAv qemu image! then we’ll go back to EVE-NG lab and will try to add the ASA image, this time we should see it without any problem. Note: EVE-NG folder naming is very important!!!

Now is the time to connect two ASAv Firewalls with this icon👇 just drag and connect two devices simply.

So here we have to define which interface of ASAv1 connect to ASAv2

Then from the left menu select more actions, and choose start all nodes

Finally, just double-click on both ASAv and you will provide putty access to both Firewalls.

I hope you enjoy this article. I appreciate it if you can share the article or write a comment and like it.

How to make Specific IPSEC tunnel down even all other tunnels should stay up


Real Time Scenario. Please watch the Video for detailed steps


https://www.youtube.com/watch?v=FOXjzQd6KHs&t=1272s


Thursday, February 17, 2022

Cisco Router Password Recovery

Step-by-Step Procedure

  1. Attach a terminal or PC with terminal emulation to the console port of the router. Use the following terminal settings:
    9600 baud rate
    No parity
    8 data bits
    1 stop bit
  2. If you still have access to the router, type show version and record the setting of the configuration register; it is usually 0x2102 or 0x102.
  3. If you don't have access to the router (because of a lost login or tacacs password), you can safely consider that your configuration register is set to 0x2102.
  4. Using the power switch, turn off the router and then turn it back on. Important: To simulate step 4 on a Cisco 6400, pull out and then replace the Node Route Processor (NRP) or Node Switch Processor (NSP) card. Important: To simulate step 4 on a Cisco 6x00 using NI-2, pull out and     then replace the NI-2 card.
  5. Press Break on the terminal keyboard within 60 seconds of the power-up to put the router into ROMMON. If the break sequence doesn't work, see Possible            Key Combinations for Break Sequence During Password Recovery for other key combinations.

Type confreg 0x2142 at the rommon 1> prompt to boot from Flash without loading the configuration.

  1. Type reset at the rommon 2> prompt. The router reboots but ignores its saved configuration.                                        
  2. Type enable at the Router> prompt. You'll be in enable mode and see the Router# prompt.
  3. Important: Type configure memory or copy startup-config running-config to copy the nonvolatile RAM (NVRAM) into memory.
  4. Type write terminal or show running-config. The show running-config and write terminal commands show the configuration of the router. In this configuration you see under all the interfaces the shutdown command, which means all interfaces are currently shutdown. Also, you can see the passwords (enable password, enable secret, vty, console passwords, and so on) either in encrypted or unencrypted format.The unencrypted passwords can be re-used, the encrypted ones will have to be changed with a new one.
  5. Type configure terminal and make the changes. The prompt is now hostname(config)#.
  6. Type enable secret <password> to change the enable secret password, for example.
  7. Issue the no shutdown command on every interface that is used. If you issue a show ip interface brief command, every interface that you want to use should be "up up".  
  8. Type config-register 0x2102, or the value you recorded in step            2.
  9. Press Ctrl-z or end to leave the configuration mode.The prompt is now hostname#.
  10. Type write memory or copy running-config startup-config to commit the changes.
  11.  

Type no after each setup question or press Ctrl-C to skip the initial setup procedure.   

Example of Password Recovery Procedure

The example below presents an actual password recovery procedure. We created this example using a Cisco 2600. Even if you are not using a Cisco 2600, this example will be almost exactly what you experience on your product.

Router>enable
Password:
Password:
Password:
% Bad secrets 
Router>show version
Cisco Internetwork Operating System Software
IOS (tm) C2600 Software (C2600-IS-M), Version 12.0(7)T, RELEASE SOFTWARE (fc2)
Copyright (c) 1986-1999 by cisco Systems, Inc.
Compiled Tue 07-Dec-99 02:21 by phanguye
Image text-base: 0x80008088, data-base: 0x80C524F8 
ROM: System Bootstrap, Version 11.3(2)XA4, RELEASE SOFTWARE (fc1) 

Router uptime is 3 minutes
System returned to ROM by abort at PC 0x802D0B60
System image file is "flash:c2600-is-mz.120-7.T" 

cisco 2611 (MPC860) processor (revision 0x202) with 26624K/6144K bytes of memory.
Processor board ID JAB031202NK (3878188963)
M860 processor: part number 0, mask 49
Bridging software.
X.25 software, Version 3.0.0.
Basic Rate ISDN software, Version 1.1.
2 Ethernet/IEEE 802.3 interface(s)
2 Serial(sync/async) network interface(s)
1 ISDN Basic Rate interface(s)
32K bytes of non-volatile configuration memory.
8192K bytes of processor board System flash partition 1 (Read/Write)
8192K bytes of processor board System flash partition 2 (Read/Write)
Configuration register is 0x2102
Router> 


!--- The router was just powercycled and during bootup a
!--- break sequence was sent to the router.
! 
*** System received an abort due to Break Key ***  
signal= 0x3, code= 0x500, context= 0x813ac158
PC = 0x802d0b60, Vector = 0x500, SP = 0x80006030
rommon 1 > confreg 0x2142  
You must reset or power cycle for new config to take effect  
rommon 2 > reset  
System Bootstrap, Version 11.3(2)XA4, RELEASE SOFTWARE (fc1)
Copyright (c) 1999 by cisco Systems, Inc.
TAC:Home:SW:IOS:Specials for info
C2600 platform with 32768 Kbytes of main memory 
program load complete, entry point: 0x80008000, size: 0x6fdb4c 
Self decompressing the image : ###############################
##############################################################
##############################################################
##############################################################
############################### [OK] 
Restricted Rights Legend 
Use, duplication, or disclosure by the Government is
subject to restrictions as set forth in subparagraph
(c) of the Commercial Computer Software - Restricted
Rights clause at FAR sec. 52.227-19 and subparagraph
(c) (1) (ii) of the Rights in Technical Data and Computer
Software clause at DFARS sec. 252.227-7013.
cisco Systems, Inc.
170 West Tasman Drive
San Jose, California 95134-1706
Cisco Internetwork Operating System Software
IOS (tm) C2600 Software (C2600-IS-M), Version 12.0(7)T, RELEASE SOFTWARE (fc2)
Copyright (c) 1986-1999 by cisco Systems, Inc.
Compiled Tue 07-Dec-99 02:21 by phanguye
Image text-base: 0x80008088, data-base: 0x80C524F8 
cisco 2611 (MPC860) processor (revision 0x202) with 26624K/6144K bytes of memory.
Processor board ID JAB031202NK (3878188963)
M860 processor: part number 0, mask 49
Bridging software.
X.25 software, Version 3.0.0.
Basic Rate ISDN software, Version 1.1.
2 Ethernet/IEEE 802.3 interface(s)
2 Serial(sync/async) network interface(s)
1 ISDN Basic Rate interface(s)
32K bytes of non-volatile configuration memory.
8192K bytes of processor board System flash partition 1 (Read/Write)
8192K bytes of processor board System flash partition 2 (Read/Write) 

--- System Configuration Dialog --- 
Would you like to enter the initial configuration dialog? [yes/no]: n  
Press RETURN to get started!  
Router> 
Router>enable
Router#copy startup-config running-config
Destination filename [running-config]?
1324 bytes copied in 2.35 secs (662 bytes/sec)
Router#
00:01:24: %LINEPROTO-5-UPDOWN: Line protocol on Interface BRI0/0:1, changed state to down
00:01:24: %LINEPROTO-5-UPDOWN: Line protocol on Interface BRI0/0:2, changed state to down
Router#configure terminal
Enter configuration commands, one per line. End with CNTL/Z.
Router(config)#enable secret cisco
Router(config)#^Z
00:01:54: %SYS-5-CONFIG_I: Configured from console by console 
Router#show ip interface brief
Interface      IP-Address        OK?     Method     Status                   Protocol
Ethernet0/0    10.200.40.37      YES     TFTP       administratively down    down
Serial0/0      unassigned        YES     TFTP       administratively down    down
BRI0/0         193.251.121.157   YES     unset      administratively down    down
BRI0/0:1       unassigned        YES     unset      administratively down    down
BRI0/0:2       unassigned        YES     unset      administratively down    down
Ethernet0/1    unassigned        YES     TFTP       administratively down    down
Serial0/1      unassigned        YES     TFTP       administratively down    down
Loopback0      193.251.121.157   YES     TFTP       up                       up
Router#configure terminal
Enter configuration commands, one per line. End with CNTL/Z.
Router(config)#interface Ethernet0/0
Router(config-if)#no shutdown
Router(config-if)#
00:02:14: %LINK-3-UPDOWN: Interface Ethernet0/0, changed state to up
00:02:15: %LINEPROTO-5-UPDOWN: Line protocol on Interface Ethernet0/0, changed state to up
Router(config-if)#interface BRI0/0
Router(config-if)#no shutdown
Router(config-if)#
00:02:26: %LINK-3-UPDOWN: Interface BRI0/0:1, changed state to down
00:02:26: %LINK-3-UPDOWN: Interface BRI0/0:2, changed state to down
00:02:26: %LINK-3-UPDOWN: Interface BRI0/0, changed state to up
00:02:115964116991: %ISDN-6-LAYER2UP: Layer 2 for Interface BR0/0, TEI 68 changed to up
Router(config-if)#^Z
Router#
00:02:35: %SYS-5-CONFIG_I: Configured from console by console 
Router#copy running-config startup-config
Destination filename [startup-config]?
Building configuration...
[OK] 
Router#show version
Cisco Internetwork Operating System Software
IOS (tm) C2600 Software (C2600-IS-M), Version 12.0(7)T, RELEASE SOFTWARE (fc2)
--- output truncated ---
2 Ethernet/IEEE 802.3 interface(s)
2 Serial(sync/async) network interface(s)
1 ISDN Basic Rate interface(s)
32K bytes of non-volatile configuration memory.
8192K bytes of processor board System flash partition 1 (Read/Write)
8192K bytes of processor board System flash partition 2 (Read/Write)
Configuration register is 0x2142

Router#configure terminal
Enter configuration commands, one per line. End with CNTL/Z.
Router(config)#config-register 0x2102
Router(config)#^Z
00:03:20: %SYS-5-CONFIG_I: Configured from console by console 

Router#show version
Cisco Internetwork Operating System Software
IOS (tm) C2600 Software (C2600-IS-M), Version 12.0(7)T, RELEASE SOFTWARE (fc2)
--- output truncated ---
2 Ethernet/IEEE 802.3 interface(s)
2 Serial(sync/async) network interface(s)
1 ISDN Basic Rate interface(s)
32K bytes of non-volatile configuration memory.
8192K bytes of processor board System flash partition 1 (Read/Write)
8192K bytes of processor board System flash partition 2 (Read/Write) 
Configuration register is 0x2142 (will be 0x2102 at next reload)
Router#

Monday, January 18, 2021

How To Add Cisco IOU/IOL To Eve-ng

 Cisco IOU/IOL images are L2/L3 images of Switches and routers which helps you to practice for L3 devices with same features and functions which original devices has. Cisco IOU/IOL images were released for Architecture and testing purposes but today Cisco IOU/IOL images are used for CCIE routig and switching practice for CCIE routing and switching.


Eve-ng is one of the best emulator to Practice with Cisco IOU/IOL images, where you can imports the image  in eve-ng and access it via GUI. You can setup your own lab and practice as much as you want.

To install Eve-ng on you desktop check below Post-

How to install Eve-ng on Vmware.


We will explain you step by step process – how to add IOU/IOL images in Eve-ng and how to license them.


Content

1 You can check how to install Eve-ng in windows

2 Download Cisco IOU/IOL Images.

3 Uploading Cisco IOU/IOL images to Eve-ng.

4 How to generate license for Cisco IOU/IOL images.

5 Testing Cisco IOU/IOL images.


if you want to practice Cisco ASA or Ciso IOS Dyanamip  on eve-ng for your certification or knowledge then check below posts-

1. SUPPORTED IOU/IOL IMAGES

Basically Eve-ng support all the Cisco IOU/IOL images but below are recommended one.


Type EVE Image Name Version vRAM

L2 L2-ADVENTERPRISEK9-M-15.1-20130726.bin I86BI_LINUXL2-ADVENTERPRISEK9-M 15.1(20130726:213425) 192

L3 L3-ADVENTERPRISEK9_IVS-M-15.3-0.9T.bin I86BI_LINUX-ADVENTERPRISEK9_IVS-M 15.3(0.9)T 128

2. Download Cisco IOU/IOL Images Eve-ng

Images provided below are strictly for education purpose and are not hosted on networkhunt.com server. We are just indexing the links fond on internet for education purpose only.


You can download Cisco IOU/IOL images from below links.

1. Download Cisco IOU/IOL Images.


3. Add Cisco IOU/IOL images to Eve-ng

IOL or IOS On Linux, also called IOU or IOS On Unix. IOL, is a simulator available for Cisco internal use only. IOL refers to the Linux version, compiled for i386 architecture. IOU refers to the Unix (Solaris) version compiled for Sparc architecture. The term IOU usually refers to IOL too.


Because IOL is an internal IOS version, IOL can be used by Cisco employees or by authorized customers only.


Upload the downloaded image to the EVE using for example FileZilla or WinSCP to:  /opt/unetlab/addons/iol/bin


Type following command to fix permissions:


/opt/unetlab/wrappers/unl_wrapper -a fixpermissions

3. License for Cisco IOU/IOL images.

#! /usr/bin/python

print("*********************************************************************")

print("Cisco IOU License Generator - Kal 2011, python port of 2006 C version")

print("Modified to work with python3 by c_d 2014")

import os

import socket

import hashlib

import struct


# get the host id and host name to calculate the hostkey

hostid=os.popen("hostid").read().strip()

hostname = socket.gethostname()

ioukey=int(hostid,16)

for x in hostname:

 ioukey = ioukey + ord(x)

print("hostid=" + hostid +", hostname="+ hostname + ", ioukey=" + hex(ioukey)[2:])


# create the license using md5sum

iouPad1 = b'\x4B\x58\x21\x81\x56\x7B\x0D\xF3\x21\x43\x9B\x7E\xAC\x1D\xE6\x8A'

iouPad2 = b'\x80' + 39*b'\0'

md5input=iouPad1 + iouPad2 + struct.pack('!i', ioukey) + iouPad1

iouLicense=hashlib.md5(md5input).hexdigest()[:16]


print("\nAdd the following text to ~/.iourc:")

print("[license]\n" + hostname + " = " + iouLicense + ";\n")

print("You can disable the phone home feature with something like:")

print(" echo '127.0.0.127 xml.cisco.com' >> /etc/hosts\n")

Copy above text and create a text file and save as with name IOUkeygen.py

After creating license python script, upload it to Eve-ng directory –/opt/unetlab/addons/iol/bin/


After uploading the script go the directory by using below command-

cd /opt/unetlab/addons/iol/bin/


Check the directory content by below command-

ls -l


you will be able to see file with name – IOUkeygen.py


Now run the python script by using below command-

python2 IOUkeygen.py


it will give you some like below output


root@eve-ng:/opt/unetlab/addons/iol/bin# python2 ioukeygen.py

*********************************************************************

Cisco IOU License Generator - Kal 2011, python port of 2006 C version

Modified to work with python3 by c_d 2014

hostid=007f0101, hostname=eve-ng, ioukey=7f0343


Add the following text to ~/.iourc:

[license]

eve-ng = 972f30267ef51616;


Now, we will create license for IOU/IOL images


nano - c iourc


paste the license and press ctrl+x to save


[license]

eve-ng = 972f30267ef51616;


We have successfully added the Cisco IOU/IOL images to eve-ng with license.


5. Testing Cisco IOU/IOL images in Eve-ng


cd /opt/unetlab/addons/iol/bin
touch NETMAP
LD_LIBRARY_PATH=/opt/unetlab/addons/iol/lib /opt/unetlab/addons/iol/bin/<iosname.bin> 1
***************************************************************
IOS On Unix - Cisco Systems confidential, internal use only
Under no circumstances is this software to be provided to any
non Cisco staff or customers.  To do so is likely to result
in disciplinary action. Please refer to the IOU Usage policy at
wwwin-iou.cisco.com for more information.
***************************************************************

              Restricted Rights Legend

Use, duplication, or disclosure by the Government is
subject to restrictions as set forth in subparagraph
(c) of the Commercial Computer Software - Restricted
Rights clause at FAR sec. 52.227-19 and subparagraph
(c) (1) (ii) of the Rights in Technical Data and Computer
Software clause at DFARS sec. 252.227-7013.

           cisco Systems, Inc.
           170 West Tasman Drive
           San Jose, California 95134-1706

Tuesday, January 12, 2021

SUBNETTING


Understanding IP Addressing

The overall phenomenon of logical addressing works on the Layer-3 of the OSI reference model and the network components like routers and switches are the host devices that are most popularly used.

An IP Address is a 32-bit logical address that distinctively classifies a host of the network. The host can be a computer, Laptop or any other device (including Mobile)

The 32 bits binary IP address is made up of two distinctive parts i.e. The Network address and the Host address.

It also has 4 octets as each octet is having 8 bits. This octet is converted into decimal and is separated by a format i.e. dot. Thus it is represented in a dotted-decimal format. The range of an octet in binary is from 00000000 to 11111111 and in decimal from 0 to 255.

Example of an IP Address format:

192.168.1.64 (in decimal)

11000000.10101000.00000001.01000000 (in binary).


The binary one is difficult to memorize thus, in general, the dotted decimal format is used worldwide for representation of the logical addressing.


Let’s understand in detail how the binary octet values are converted into decimal values:

There are 8 bits and each bit has the value of 2 to the power n (2^n). The rightmost have the value 2^0 and left most have the value 2^7.

So the value of each bit is as follows:

2^7 2^6 2^5 2^4 2^3 2^2 2^1 2^0 (^ denotes the power)

Thus the result would be:

128+ 64+ 32+ 16+ 8+ 4+ 2+ 1

When all the bits are 1 then the values come out to be 255 (128+64+32+16+8+4+2+1= 255).

Suppose all the bits of an octet is not 1. Then see how we can calculate the IP address:

1 0 0 1 0 0 0 1, 128+0+0+16+0+0+0+1= 145.

By combining the bits of the octets in different combinations according to the need, we can derive the overall IP address of the desired network. As per the requirement, these are divided into various classes of a network called as class A, class B, class C, class D, and class E.

Most popularly class A, B and C are used for commercial purposes and class D and E have reserved rights.

Network Classes And Subnet Mask

The organization which governs the internet has divided the IP addresses into different classes of the network.

Each class is identified by its subnet mask. By the categorization of a default subnet mask, we can easily identify the class of an IP address of the network. The first octet of an IP address identifies the particular class of an IP address.

The classification is shown with the help of the below table and figure.

Class

Ist octet Decimal Range

Network/Host ID

Default subnet mask

A

1 to 126

N.H.H.H

255.0.0.0

B

128 to 191

N.N.H.H

255.255.0.0

C

192 to 223

N.N.N.H

255.255.255.0

D

224 to 239

Reserved for Multicasting

E

240 to 254

Experimental


  • The class ‘A’ Address ranging from 127.0.0.0 to 127.255.255.255 cannot be used and is reserved for loopback and diagnostic functions. The numbers of hosts which can be connected to this network are greater than 65536 hosts.
  • The number of hosts connected within the class B networks is from 256 to 65534 hosts.
  • The number of hosts connected within the class C network is less than 254 hosts. Therefore the class C network mask is perfect for the minor networks which are known as subnetworks. We utilize the bits from the last octet of class C for constructing mask. Thus we need to rearrange and optimize the subnet depending upon the availability of the bits.


Subnet Mask

Last octet binary Value

No. of hosts connected

255.255.255.128

10000000

126

255.255.255.192

11000000

62

255.255.255.224

11100000

30

255.255.255.240

11110000

14

255.255.255.248

11111000

6

255.255.255.252

11111100

2


Let us assume the case of a class A IP address:

For Example, take a pair of IP address and subnet mask 10.20.12.2 255.0.0.0

#1) Convert this Combination into a binary value:


#2) The bits corresponding to the subnet mask with all 1’s represent the network ID as it is a class A network and the first octet represents the network ID. The bits corresponding to all 0’s of the subnet mask is the host ID. Thus the network ID is 10 and the host ID is 20.12.2

#3) From the given subnet, we can also calculate the IP range of a particular network. If the IP is 10.68.37.128 (assuming class A case)

Subnet mask: 255.255.255.224
IP range =256-224= 32.
Out of 32 IP’s, ideally one is used for the gateway, second is for the network IP and the third is for broadcast IP.
Thus total usable IP’s are 32-3= 29 IP’s.

The IP range will be 10.68.27.129 to 10.68.27.158.

Subnetting

Subnetting allows us to create various sub-networks or logical networks within one network of a particular class of the network. Without subnetting, it is almost unrealistic to create big networks.

For constructing a big networking system, every link must have a unique IP address with every device on that linked network which is being the participant of that network.

With the help of a subnetting technique, we can split the large networks of a particular class (A, B or C) into smaller subnetworks for inter-connection between each node which are situated at different locations.

Each node on the network would have a distinctive IP and subnet mask IP. Any switch, router or gateway that connects n networks has n unique Network ID and one subnet mask for each of the network it interconnects with.

The formulae of subnetting is as follows:

2^n >= requirement.

The formulae of a number of hosts per subnet is as follows:

2^n -2

Now let’s understand the overall process with the help of an Example:

We have taken an example of Class C network ID with a default subnet mask.

Suppose Network ID/IP address is: 192.168.1.0

Default Subnet mask: 255.255.255.0 (in decimal)

Default Subnet mask: 11111111.11111111.11111111.00000000 (in binary)

Thus the number of bits are 8+8+8+0= 24 bits. As mentioned earlier, for subnetting in class C network, we will borrow bits from the host portion of the subnet mask.

Therefore, to customize the subnet as per requirement:

We take a subnet mask of 255.255.255.248 (in decimal)

11111111.11111111.11111111.11111000 (in binary).

From the above binary notation, we can see that the last 3 bits of the last octet can be used for host ID addressing purpose.

Thus the number of subnets= 2^n = 2^3= 8 subnets (n=3).

Number of hosts per subnet= 2^n -2= 2^3 -2= 8-2= 6 Subnets i.e. usable Host IP.

Now the IP addressing scheme is as follows:

Network IP

First Usable IP

Last Usable IP

Broadcast IP

192.168.1.0

192.168.1.1

192.168.1.6

192.168.1.7

192.168.1.8

192.168.1.9

192.168.1.14

192.168.1.15

192.168.1.16

192.168.1.17

192.168.1.22

192.168.1.23

192.168.1.24

192.168.1.25

192.168.1.30

192.168.1.31

192.168.1.32

192.168.1.33

192.168.1.38

192.168.1.39

192.168.1.40

192.168.1.41

192.168.1.46

192.168.1.47

192.168.1.48

192.168.1.49

192.168.1.54

192.168.1.55

192.168.1.56

192.168.1.57

192.168.1.62

192.168.1.63

The subnet mask for all the above IP’s in the table is common i.e. 255.255.255.248.

With the help of the above example, we can clearly see, how subnetting helps us to construct inter-networking between various links and nodes of the same subnetwork. All these above IP’s can be used for inter-networking the devices within the overall network.

Note: Subnet mask is most widely used everywhere in a computer networking system. Hence, there is one more method to represent the subnet mask of a particular network which is chosen and standardized as it is easy to denote and memorize.

Subnet mask– 255.255.255.248 (binary)

11111111.11111111.11111111.11111000 (decimal notation)

From the decimal notation we can calculate the number of bits having 1 in each octet:

8+8+8+5= 29

Thus the Subnet mask can be denoted as /29.

With Network ID it can be denoted as 192.168.1.9/29.

From the above notation, anyone who knows the standard notation and formulae of subnetting can understand that the IP is using a subnet mask of 255.255.255.248 or /29.

The different Subnetting scheme in binary and decimal notation is shown below:

Subnet Mask

Notation in decimal

Notation in Binary

Number of Usable IP

/24

255.255.255.0

11111111.11111111.11111111.00000000

254

/25

255.255.255.128

11111111.11111111.11111111.10000000

126

/26

255.255.255.192

11111111.11111111.11111111.11000000

62

/27

255.255.255.224

11111111.11111111.11111111.11100000

30

/28

255.255.255.240

11111111.11111111.11111111.11110000

14

/29

255.255.255.248

11111111.11111111.11111111.11111000

6

/30

255.255.255.252

11111111.11111111.11111111.11111100

2

The ‘/’ notation method of the subnet mask is most widely used as it is easy to memorize and the binary notation and decimal are very lengthy in size.

As we are denoting the mask scheme while interconnecting the network components through the figure, if we use the decimal and binary method then the overall diagram will become very complex and difficult to understand.

There are so many IP’s on the platform to be shown and it becomes difficult to memorize as well. Thus generally, people who are familiar with routing and IP addressing scheme use short notation methods in figures and diagrams.
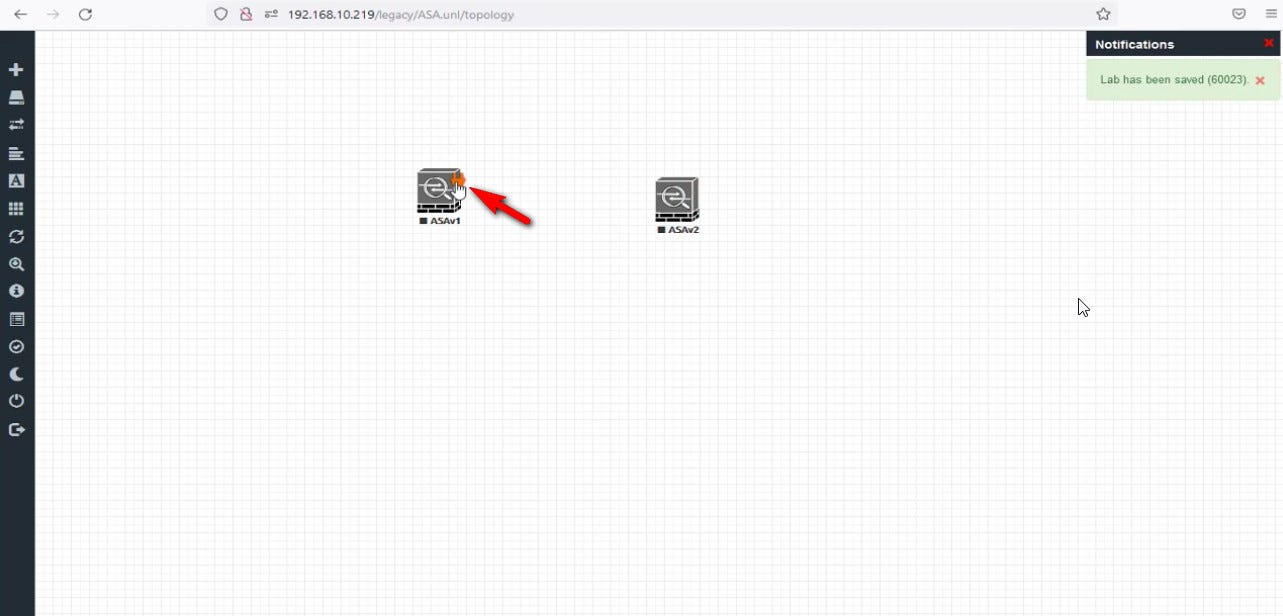
Example 1:


Understanding Subnetting with an Example of Interconnection of Network Devices:


The above figure shows how subnetting is used for interconnection of subnetworks. Firstly, as per our need for the number of hosts required to be connected and meet the other requirements of the network, we customize the subnet mask and network ID accordingly and assign to the devices thereafter.

The above network is using class C network mask and /29 subnet mask means network IP can be divided into 8 subnets. Each router has a unique IP address for each linked subnetwork.

There is an important point to be noticed that the more the bits we carry from the subnet mask for host ID then the more will be the subnets obtainable for the network.

Example 2:

Class B Network:

Subnet mask

Notation in binary

Number of Usable IP

Number of Subnets

255.255.128.0

11111111.11111111.10000000.00000000

32766

2

255.255.192.0

11111111.11111111.11000000.00000000

16382

4

255.255.224.0

11111111.11111111.11100000.00000000

8190

8

255.255.240.0

11111111.11111111.11110000.00000000

4094

16

255.255.248.0

11111111.11111111.11111000.00000000

2046

32

255.255.252.0

11111111.11111111.11111100.00000000

1022

64

255.255.254.0

11111111.11111111.11111110.00000000

510

128

255.255.255.0

11111111.11111111.11111111.00000000

254

256

255.255.255.128

11111111.11111111.11111111.10000000

126

512

255.255.255.192

11111111.11111111.11111111.11000000

62

1024

255.255.255.224

11111111.11111111.11111111.11100000

30

2048

255.255.255.240

11111111.11111111.11111111.11110000

14

4096

255.255.255.248

11111111.11111111.11111111.11111000

6

8192

255.255.255.252

11111111.11111111.11111111.11111100

2

16384

The above table shows the details of the number of subnets and hosts that can be connected per subnet mask by using Class B subnetting Scheme.

For connecting a host in big quantity and WAN communication systems, the Class B subnetting is very effective as it gives a wide range of IP’s for configuration.